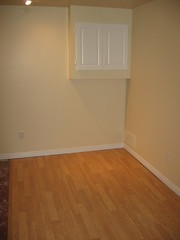
Okay, although I’m getting increasingly tired and grumpy, I’ve finished phase III of the basement project. For the past 2 weeks, I’ve basically been up till 11 or 12 each night working on all these projects. It’s the curse of being a perfectionist. The good news is that we’ve got everything finished off that we wanted to have done before the carpet goes down, which is on Monday. Of course we’re leaving on a bus to NY tonight, so timing was of the essence.
Earlier, I had lamented to Kev that I thought putting down the laminate should only take about 40 minutes. Well, while that may be true, it didn’t account for the prep of vapor barrier, cutting the pieces to the perfect size, trimming the lip on the edges where it was needed, installing the plastic track and mitring in for the trim and clean-up! Long story short, I basically worked on this from 7pm till 11:30pm! D’oh! So much for an easy project. At any rate, the finished product looks great in my opinion. I even thought we should’ve maybe done the whole rec room with this. I’ll probably end up renovating my studio with it next.
Now, back to the trim. It came with a little red plastic track to fasten to the floor, in which the trim would lock in. The instructions? “Fasten track to subfloor with provided screws. If installing on concrete, first install the plastic anchors by drilling holes, then use screws to mount track.” Sounded easy, but if you’ve ever tried drilling holes in 50-year old concrete, you’d know what I say when I say the damn hole never goes exactly where you want. No matter how hard I tried, the bit tended to wander a little, and holes would be slightly off. The result? Track that wouldn’t sit exactly where I wanted, hence some visible joints in the trim, and un-even surface. These things drive me batty! But at least I’ll always know who did it, and why it turned out that way. Luckily, the bar will be the focal point, so unless you’re really looking, you won’t notice the slight imperfections (hopefully). Anyway, that’s it till the carpet and then my quarter round installation.