Hey gang, just wanted to let you know that my new domain is born! I finally broke down and got my own domain name, to more accurately reflect the direction this site is going to take. Please say hello to https://activesteve.com! Over the next few months, I’ll be totally re-formatting this website to become my more ‘professional’ race-oriented site. I’ll introduce a new style, some new features, and hopefully sub-sections. You’ll still get the same riveting tales, but differently organized. I’ll keep personal and travel tales in one area, and all race-related goodies elsewhere. This is all part of my re-branding strategy that I’ll be undertaking in order to better market myself in hopes of securing some sponsorship deals for next year (no, not CDN Gov. sponsorship, but real ones!). With all the racing and travelling for races I plan to do, including NZ, I need to start soliciting people for help! In the meantime, if you’ve got links to this website, you might want to rename them to activesteve.com, in order to make sure the traffic gets attributed to my ‘official’ site from now on! Thanks, and please stay tuned for the exciting changes (as long as I can find the time to implement them while juggling two jobs!).
You may also like
Howdy folks! I’m sure if you’re reading this post, you’re expecting me to be writing about my latest race result, right? Well, much as I’d like to jump the gun and get right to it, I’m still a couple posts behind, so rather than just skip them, I’m forcing myself to at least write a few paragraphs on a couple things that happened before this weekend 🙂 As you’re no doubt aware, I’ve been doing a lot of training lately in preparation for my Iron distance triathlon. However, in the last few weeks of training for any big event, you’re supposed to do what’s called a taper, which is when you reduce you’re training volume. So this post and the next are about what I did during that taper. It’s important to make sure that you take some time to recover and get yourself mentally prepared for the big race! Read on to hear about what I did a few weeks back.
Brace yourselves friends, for I am about to do something that I virtually never do. Those who know me will understand that talking about work is something that I rarely do, and usually only when prompted. The inevitable questions around ‘what do you do’ sort of bore me, because to me work stays at work, and when I leave the building, I don’t take it with me. However, in an unprecedented case of giving a crap, I’ve decided to venture out and post a little something about my current work stuff. Don’t worry, this site will not devolve into a diatribe about my daily grind. Trust me, both you and I are probably much more interested in my other life ;-). However, I’ve gotta get this off my chest, so please read on for a rare insight into WorkerSteve.
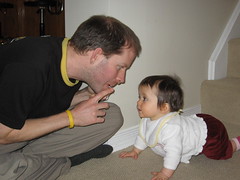
Wow, it’s hard to believe, but it’s been almost a year since I became an uncle (and subsequently Godfather) to the cute Helena Murielle Meyer! On Friday, April 13th, she’ll be one year old! So how exactly has all this changed me, you might wonder? Well, on the global scheme, I’d have to say that it hasn’t really changed me too much, but it has certainly added a bit of extra joy in my life! Of course, the group of you who have already jumped into parenthood are no doubt fully aware of this concept of new joy, but for a guy like me, well it’s a new experience. Anywho, to learn more about my thoughts and experiences one year into this gig, read on.
When Helena first arrived, I’m not sure what I was expecting. I suppose I thought that right away, I’d have a little niece to play with and be entertained by. Well, that really isn’t the case for the first few months. Each time I would go and visit Helena, invariably, it would basically just be a visit with Andrea and Patrick while Helena slept. The nice part about that was that Helena wasn’t too noisy or fussy. She was quite content to sleep away the time. She also wasn’t exactly growing at a very rapid pace. For quite a while, she stayed tiny, which had her mom and dad a little concerned. They had her on a rigourous diet, having her eat all the time pretty much. She started putting on a little weight, but was still at the bottom of the charts as far as size was concerned. But really, does that surprise anyone? Have a look at both parents, and tell me what you think?!
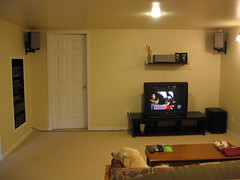
Whew! We’re almost there. I finished off putting the quarter round along all the new carpet, to give it the finished look. I also managed to get all the speaker mounted, with the wiring running through the walls and ceiling. It was not what I’d call and easy task, but the end result is a very clean installation of the sound system for the bar / rec room. You can check out the latest shots of the basement, including a nice picture of the rat’s nest that is the wiring jumble for all the AV gear in my media cabinet. Basically, all that remains is getting the new couch, which we’ve just got word will be delivered to us next Saturday (Dec.3rd), and building the bar. Now obviously, the couch is an easy one. However, getting the bar built is a different story. I’m working on it now, but there is a lot of fine woodwork that’ll have to go into it, and I don’t want to screw up. I’ve even bought yet another toy to help with that. I picked up a new 2 1/4 HP plunge router for the detail work. So, even though the materials will have only cost me about $700, the tools that I ‘had’ to buy for the job ran me over $1,000 extra!! Good grief. Anyway, stay tuned for updates on the bar build.


